We’re in Branson
We’ve had this trip planned for a while, and I can’t believe it’s already here. We were messing around on the internet one night and discovered Branson is home to the Titanic Museum. Andrea’s a big fan of the movie, and I’ve always been facinated by the story since I was in grade school, so that was kinda the seed that was planted to start the planning.
We got to town around 4:30 or so, and have just kinda been feeling our way around so far. There’s a lot of stuff here, but honestly I feel a little out of place. Branson seems set up for two different demographics. The Senior Citizen, and the Family Vacationer. Lots of buffets, gift shops with oversize broaches, and about 200 different go-kart tracks and water slides. And of course TONS of shows to go see.
But that’s not to say there’s nothing for us to do. Just today in the short time we’ve been here we found a nice microbrewery called Charlie’s and I had an excellent dark wheat beer while Andrea enjoyed a tasty chicken-fried steak. We also visited the Hollywood wax museum. Lots of celebrity figures and stuff and they let you pose with ’em and take your own pictures even. Pretty cool. I know Mom’s coming in a few weeks so I won’t post all our pictures and spoil it, but here’s a couple of my favorites. The rest of the pictures are in my Picasa gallery if you want to see who else is in the museum.
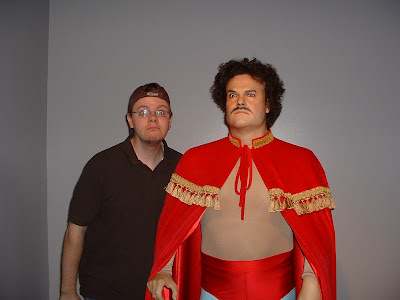
Jack Black and I sharing expressions.

This one kinda freaks me out because the picture almost looks real! Even the wax Hef' can get the ladies in bed!
So we’re back at the Holiday Inn Express now. In our SECOND room. At just before midnite (while typing this post actually) water started dripping from our ceiling into our room. Tried to call the front desk… but the phone didn’t work! So I make myself halfway presentable and go up to the front desk and explain what’s going on. Didn’t have to be mean, or nasty or anything. And they sent somebody over to look at the leak, and immediately moved us to a king suite! Nice. We don’t have our own hot tub or anthing, but it’s a lot nicer room, and all it cost was a few drips!
But now I need to sleep. Tomorrow is on to the Titanic museum, and whatever else we end up doing. Who knows! Here’s a few pics we shot today of the outside of the museum. I don’t think the ship is QUITE full size, but it’s damn close. 4/5 size maybe. Still pretty darn big.

ICEBERG! I hope the museum is still floating tomorrow.

Weird to see half a ship right in the middle of town.
BONUS!
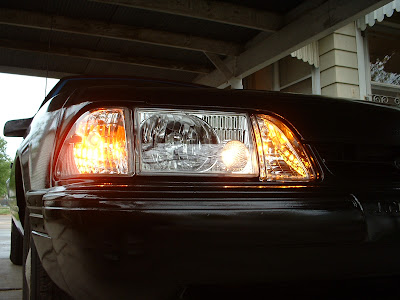
I was trying to explain to Mom tonight what these little lights are on Andrea’s new headlights. Just next to the main headlight, it looks kinda like a fog light… only it’s not really bright enough to light anything up. It doesn’t do anything, so I’m just calling it a “bonus light”. Since the original lights didn’t have these, I just tapped into the park lights, so there ya go. Bonus lights on Andrea’s car!
04.25.09I thought Andrea would have posted this…
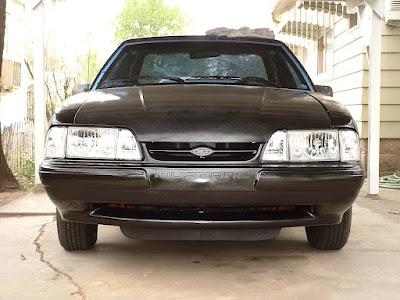
Got Andrea’s new headlights installed today. They’re not what I would have chose, but I admit they look better than I thought they would. She took a drive tonight and said they’re tons better than her old ones, so money well spent I guess.
Oh and don’t judge my painting abilities quite yet. The paint isn’t very glossy because I just got done wet sanding it. More paint hopefully tomorrow night or monday. 4 coats to go! (Maybe more)
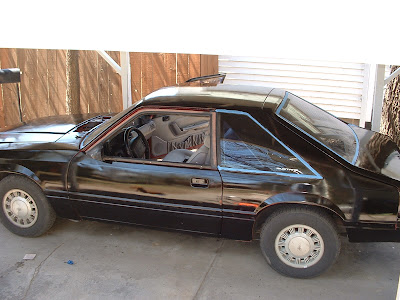
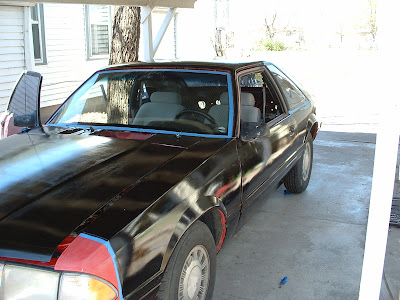
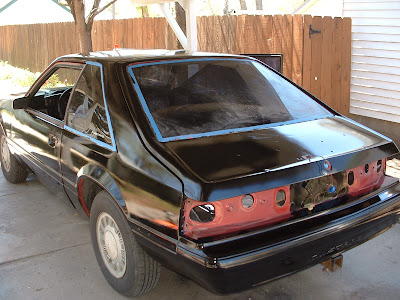
04.21.09A few pics of Andrea’s car
Well, we’re really making some progress now. Got two coats on just about everything except the front header panel/bumper. I want to wait to tear into that until her new headlights come in on Friday. No sense taking the old ones out. Putting the old ones back in. Taking the old ones out.. and putting the new ones in! She got some (IMHO) goofy ‘euro’ headlights. I called her a ricer. But she got what she wanted and is happy, and that’s what’s important.
Here’s some shots with a couple of coats on. Got one more coat, then wetsand. Then three more coats, wetsand. Then see where we’re at. Black is a tough color so I might go up to 10… just don’t know yet. It’s not going to look perfect. But I’ll get it looking as good as I can!
On to the next project!
Well today was the first real day of work on Andrea’s car getting it ready for paint. Pulled a lot of trim and did a lot of sanding. It’s gonna be a lot of work, but it’s definitely looking doable. Thankfully there’s not near the rust that there was on my car. But still a few spots here and there.
Andrea has been doing just as much work as I have, which I gotta say is pretty cool! How many guys can say, “Yeah my wife helped me prep the Mustang for paint tonight.” Just the lucky ones. 😉
04.10.09Finally finished.
Well one stubborn axle nut and some rainy weather made for a worthless Thursday. But I put the car back together enough to go down the street and get somebody with a real impact wrench to break it loose for me and that did the trick! So here’s the rest of the junk I replaced.
Before the tie rods are out you can pull the pin and take off the nut for the upper ball joint.
Then remove the brake line bracket from the ball joint stud. This will allow you to move the brake caliper out of the way later.
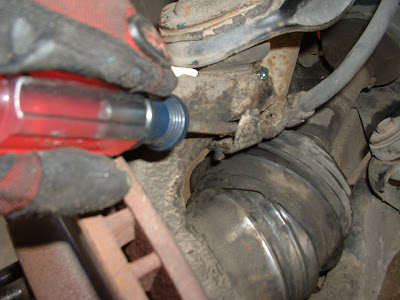
It might seem a little redneck, but take a sturdy screwdriver and stick it through the opening in brake caliper and into one of the openings along the outside of the brake rotor. This will keep the hub from turning in the next few steps.
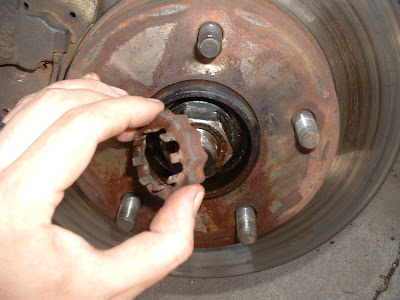
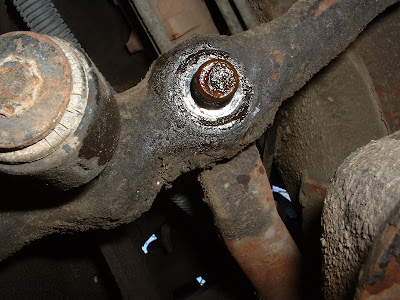
Then pull the cotter pin from the axle nut and remove the retainer.

Then get a big ass socket (36mm in this case) and loosen the axle nut. This was the PITA part because the passenger side was really on tight. Ended up having to take it to a shop and they broke it loose for free. If you ever have to do this. Good luck!
Then it's time to crawl back under the car and take loose the six bolts that hold the axle to the output shaft.
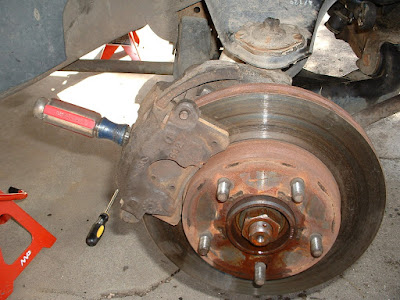
Then I took the brake caliper off and used a delicate and specialized tool called an "old coat hanger" to tie the caliper up and out of the way. Then removed the rotor and then the tie rods using the same method as the previous post.
Now more of this fun stuff. I finally got me a BFH and hammered apart the upper ball joint using the same pickle fork I used for the tie rod ends. MUCH quicker with a BFH!
Once that is loose the spindle and hub drops down and there's FINALLY enough room to pull the old drive axle out! Very gratifying moment.
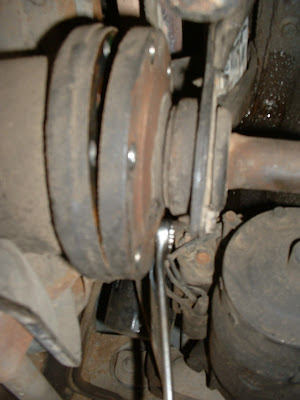
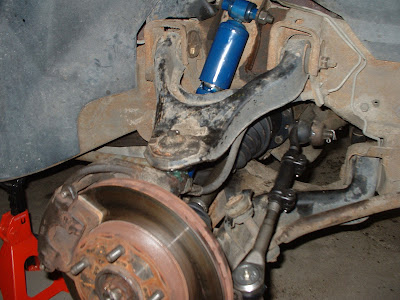
The axle doesn't NEED to be out to change shocks, but there sure is a lot more room, so it's best to do that before the new axle goes in. First I just cracked loose the bolts holding the shock in the mount.
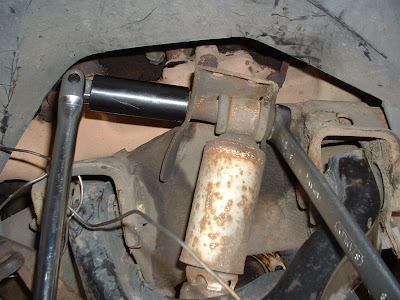
Upper shock mount.
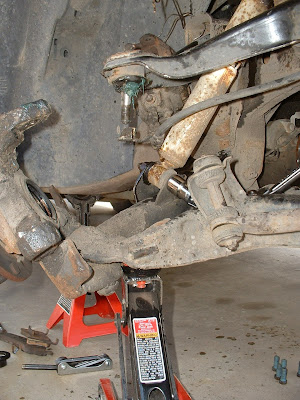
Next, before I removed the bolts for the shock, I placed a jack under the lower control arm. This is so when the shock is removed, the jack will keep the control arm from being violently pushed down. If you didn't do this and you pulled the shock out anyway, the whole thing would to POP like a jack-in-the-box.
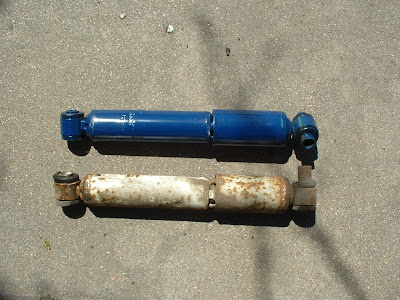
Then it's real easy. Take the bolts out and the old shock slides right out, and the new one is ready to go in!
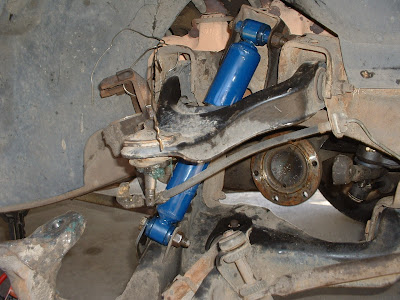
BAM!
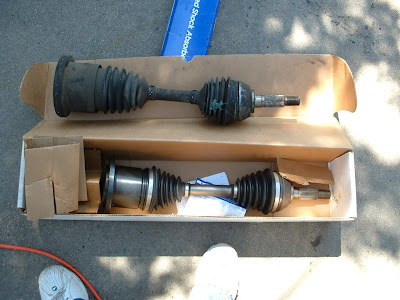
Now I just basically start working my way back to the beginning, only using nice NEW parts instead of crusty old ones. The new axle slides in nicely.
Once it's all back together, it looks good! And is a lot more solid too!
So I just got it back from the shop and took it for a drive on the highway. Runs right down the road! Felt good to have the car back cruising again. Looking forward to some trips now in a more comfortable ride. Not that Andrea’s car isn’t comfortable. It’s just not as… roomy. Hehe. So finally a project I can knock off the list. Next, repainting the Mustang. Plenty of pictures coming for that too I’m sure!
A lot of work… Half way there.
Well now that I’ve got myself a new job, I felt like I could devote some time to a project that’s needed done for a while now. Rebuilding the front steering on the Toronado. I got the driver’s side done today. If the weather holds out I’m going to tackle the other side tomorrow. I ran out of daylight, but mostly I didn’t want the neighbors complaining about me hammering on my car until the wee hours of the morning.
I tried to take a lot of pictures so I could possibly post a “How To” article on Oldspower.com, but I kinda got on a roll and in a hurry to get done for the night when I started pulling the axel out, so I’ll have to get pictures of the otherside tomorrow.
Pictures to follow are kinda close quarters, so here’s a basic image to give you an idea of how the steering linkage is laid out. There’s some difference because of the unique nature of the Toronado front wheel drive, but the parts involved and the principle are exactly the same.
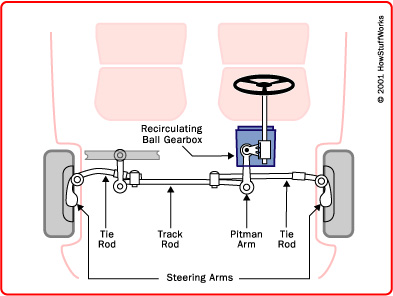
Parts I'm replacing are the idler arm (opposite of the Pitman Arm) and tie rods. Not pictured, but I'll also be doing the drive axles and front shocks.
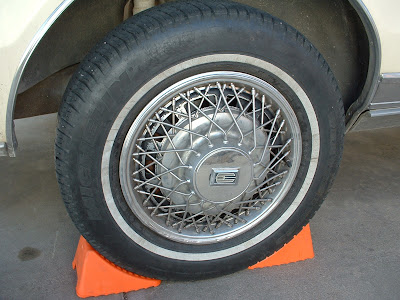
First I set the park brake and made sure the rear wheels were secure.
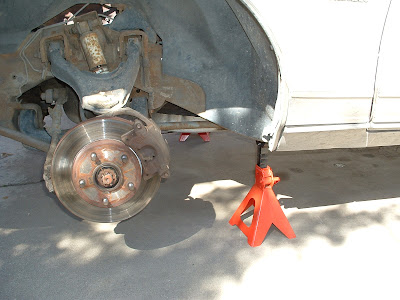
Jacked up the front of the car and removed the front wheels (realizing how much my cheap ass impact wrench sucks).

PB Blaster. Good stuff for breaking stubborn nuts and bolts loose.
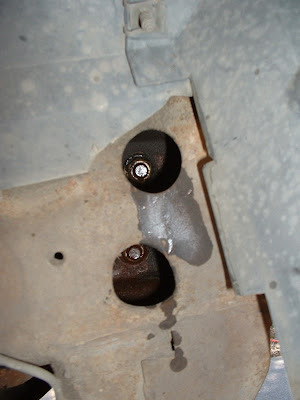
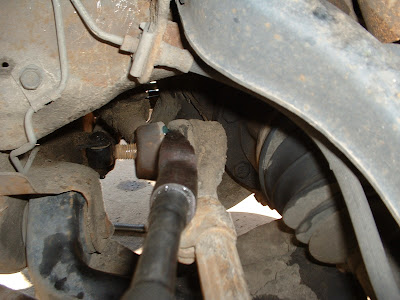
First order of business was to tackle the idler arm. This is the part that is worn out enough I was afraid to travel too far from home. Two bolts are tucked inside the framerail.
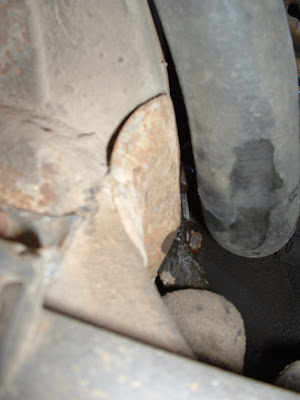
Here you can see (sorta) the idler arm bracket bolted to the otherside of the frame. The bolts are a little tricky to get to, but the radiator hose has enough give to make it doable.
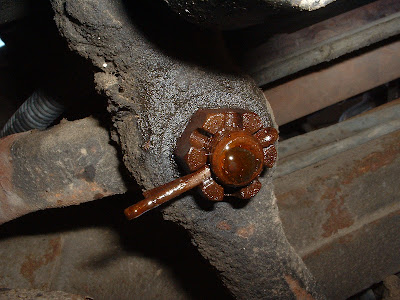
Once the bracket is off the frame, I took the cotter pin out of the nut that holds the idler arm to the center link. Work it PB Blaster!
And it's off.
But oh, that's not it. Now you have to hammer the idler arm apart from the center link. This part took me forever, mostly becase I don't have a BFH (Big F'n Hammer). So after an hour of hammering and coming at it from different angles, I finally got it off.
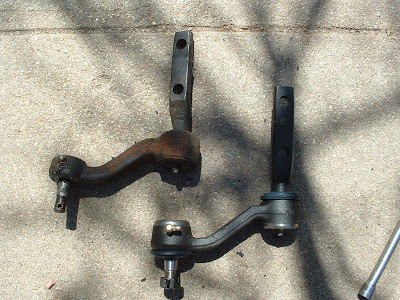
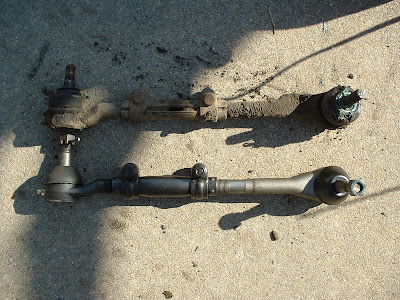
There we go! Old one off. New one ready to go. Very happy to see "Made in the USA" stamped on the new one. This one is a good bit heavier too. The old one you could grab the bracket and twirl the arm around like a noise maker. The new one is a lot more sturdy and should fix the main problem of wobbly steering.
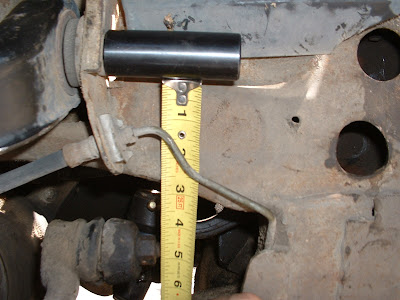
Installation was just the reverse of removing the old one, only quite a bit quicker. It's so nice not having to work with rusty old stuff! But it's important to have the idler arm mounted at the correct height. Too high or low and it will make it difficult to align the car.
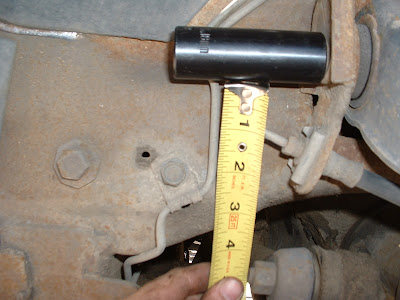
Alright. Drivers side and passenger side are lined up. Think of it like you're holding a broom stick level with both hands. If you move one hand up, it's going to push the other side down. You want the idler arm at the exact same height as the pitman arm on the other side so the steering remains aligned.
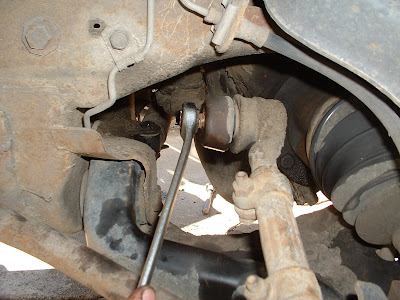
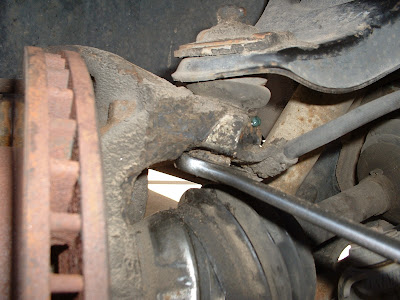
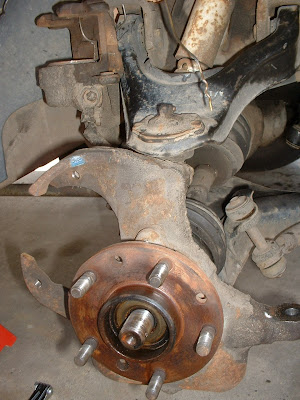
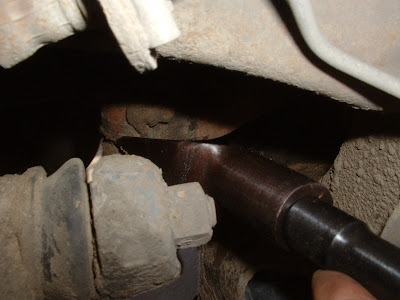
With the idler arm done, I moved to removing the tie rods on the passenger side. The idler and pitman arms hold the center link to the frame/steering box. The tie rods attack the center link to the spindle, which is what the wheels are actually mounted to and the part that actually turns your car. Removing these was much the same as the idler arm. You remove a cotter pin on the nut, remove the nut, and hammer them out with a pickle for. Fortunately these were much less stubborn!
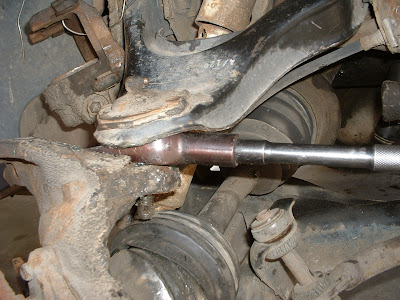
Removing the outer tie rod end nut. You can see the brake rotor which is attached to the spindle by the hub. This joint is what "pushes" the wheel to turn when you turn the wheel.
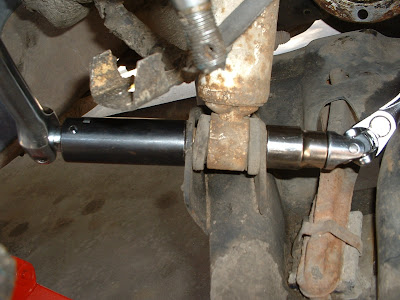
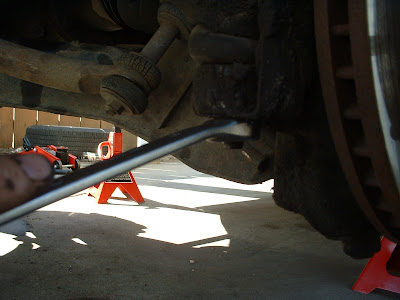
Hammer those babies out now.
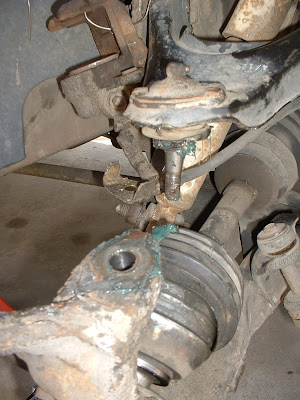
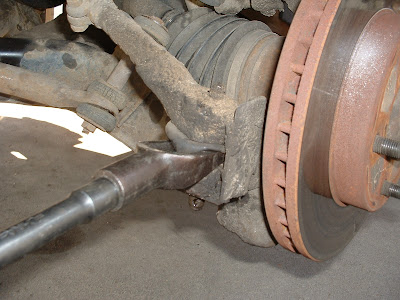
Separating the upper tie rod.
Old one out. Now for the new one. I tried to adjust the new one to the same length of the old one. This will help keep the car close to being aligned correctly. But it's going to have to go into a shop for a professional alignment after all this work anyway.
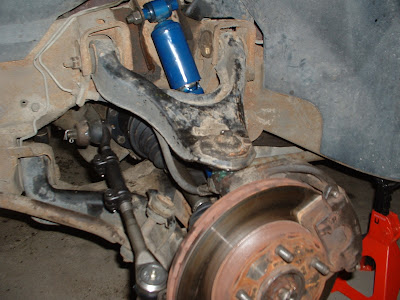
From this point on I kinda stopped taking pictures. But here you can see the finished driver's side. New tie rod, new drive axle, and a new shock absorber. I have to do the same thing to the other side, so I'll get pictures of the drive axle and shock installation tomorrow.
Let there be lounge!
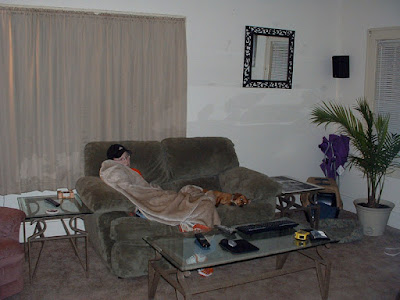
Well we got us a loveseat for the living room. Finally! You can still see the old canvas chair folded up in the corner (why the heck is that still in the room?). We went originally to go look for a full couch. I didn’t want to spend a ton of money though, and a lot of the stuff we were looking at was pretty pricy. To make matters worse, I really made it hard when I ruled out that microfiber/fake suade feeling stuff. That material drives me crazy. Apparently I’m the only one, but it just feels like tiny little velcro on my hands. This is similar material, but a lot more ‘fuzzy’ feeling.
It’s still weird sitting on a comfy… (I’m just gonna call it a couch) couch and watch a movie or playing the Wii. I’m so used to that squeaky uncomfortable canvas chair. All we’ve had is the one recliner since we moved is as our only real piece of furniture. But I think I’ll get used to it. Hehe.
03.23.09Thanks, Belinda!
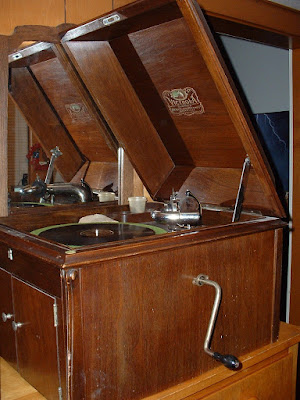
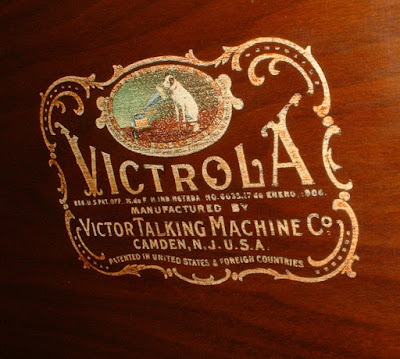
Now this is cool. I always talked about having one, but never really thought I’d have a chance to buy one other than eBay. These are big, old, and quite fragile! I spotted this at Andrea’s mom’s house a few months ago and fell in love with it. It’s a 1920 Victrola. I’m still not sure what she was thinking… but she just gave it to us. It’s now definitely the oldest thing I own (except maybe the rocks from Oregon beach, hehe).
Waiting for a good table to rest on.
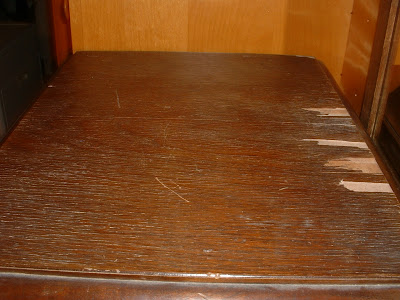
It's 90 years old! What do you expect?
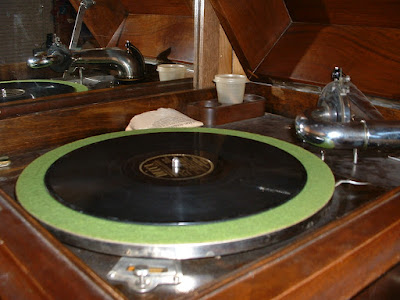
It’s not incredibly valuable and it does need a little freshening up. The motor squeaks a bit and doesn’t quite last a whole play, the turntable is a little wobbly but after all these years, it’s pretty amazing that it still works! I recorded a sound clip HERE that you can listen if you want. If that doesn’t make you feel like you’re in a different era, nothing will!
I’m going to see if I can clean it up mechanically, but I don’t have the tools or the skills to restore the cabinet like it should be. I’d just end up doing more harm than good. But I’ll clean it up nice and it should make for quite the conversation piece. I just think it’s too darn cool.
Rollin’
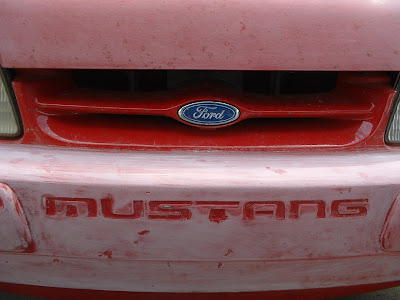
Well we’re starting the process of painting Andrea’s car. I just realized I don’t have any pictures. So for historical purposes, here’s the before shots.
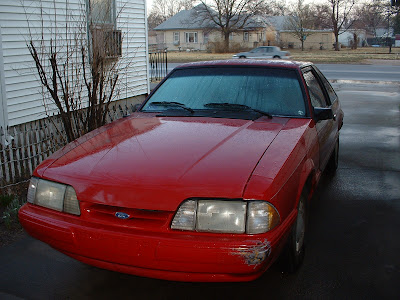
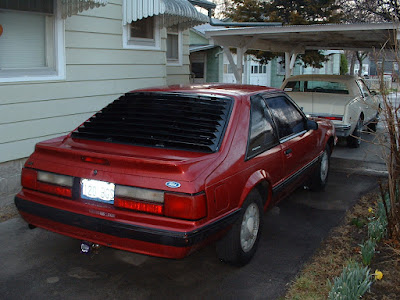
The paint really isn’t in too bad of shape other than the clear coat peeling off the hood, and the bumper spot. But it’s two different colors of red! That’s what a couple of deer will do I guess. This one should be ALOT less work than mine was, because we’re going to park it while we’re painting it. (Meaning I don’t have to put it back together everyday. ) And there’s not near the rust on it as there was on mine. But we’ll see. After it’s painted it’s going into the shop for all new exhaust and we’re getting new headlights since these are all fogged over and make it difficult to drive at night. She doesn’t even have to turn her brights off for oncoming traffic! Ha ha.
She wants black. Which is cool, but I warned her it shows any and all imperfections. But I’m sure there won’t be any. We’ll see what happens.
Hopefully it goes better than today’s automotive work did. I headed out to get the front end on my car finally fixed. Only to find out that I don’t have big enough tools to do the work! So I run to the hardware store to see if they have what I need. Heck they don’t even sell big enough sockets. So at least I leave without spending any money… But coming out to the parking lot I notice something hanging from underneath Andrea’s car. The tailpipe came loose from the muffler! Geeze! So I nurse it home and put it up on the ramps. Just pulled the rusty thing out and threw it in the trash. At least that’s one less thing that can fall off.
So back to my car I see if there’s anything I can fix with the tools I have. Front shocks? Nope, I have wrenches one size too big, one size too small. Not the one I need. How about just get the idler arm fixed? That was the part that had been scaring me to get out on the highway. I got my wrench on there… but damn it if my sockets aren’t big enough! GEEZE.
So I headed over to Harborfreight.com and scored (I think) everything I need to get it all done for about $60. Like all my projects on my car it looks like this one is going to end up about $200 over budget. Oh well, right. Still cheaper than a car payment!